High Protein Shrimp Lunch Meal Prep (Quick, Under 400 Cal)
If you’re tired of the same sad chicken breast for lunch, I have good news. Shrimp is about to become your new weekday secret weapon. It’s fast, it’s lean, and it actually tastes good without drowning in sauce. This high protein shrimp lunch meal prep comes together in under 30 minutes, stays fresh in your fridge for five days, and clocks in under 400 calories per serving with a solid 28 grams of protein. That’s the kind of meal that doesn’t feel like a compromise.
Here’s the thing about meal prepping: it only works if you actually want to eat what you’ve prepared. Most protein-packed lunch ideas are boring, dry, or require more ingredients than you have counter space for. This one is different. We’re keeping it simple, building real flavor, and skipping the diet-food monotony entirely.
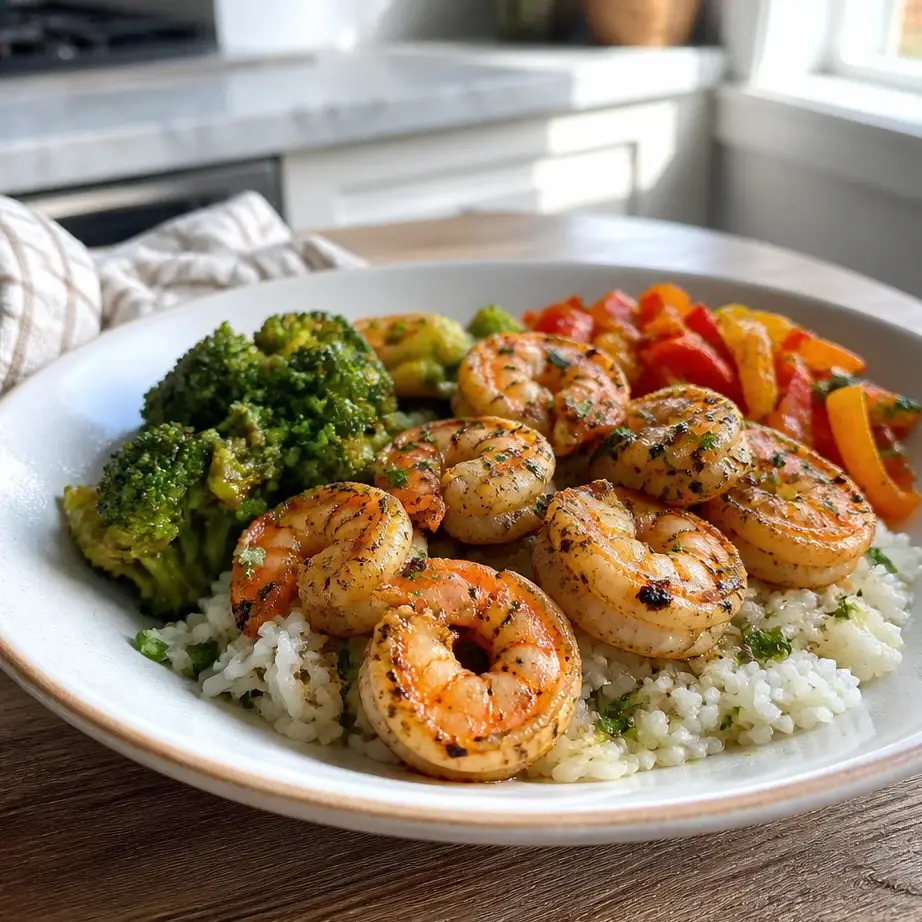
Let me walk you through the shrimp meal prep container that’s about to change your lunch rotation.
Why This Deserves a Spot in Your Weekly Rotation
- Protein powerhouse: 28g per serving keeps you satisfied until dinner, no 3 p.m. slump
- Ready in 20 minutes: No complicated prep, no long cook times
- Budget-friendly: Shrimp’s come down in price, especially frozen ones
- Actually tastes good: Lemon, garlic, and a quick sear make all the difference
- Five-day shelf life: Meal prep Sunday and eat through Friday
What Makes Shrimp the Protein MVP for Meal Prep
Shrimp isn’t just convenient; it’s one of the leanest proteins available. At just 99 calories per 100 grams, shrimp lets you load up your bowl with vegetables and healthy fats without blowing through your calorie goal. The protein content is where the real magic happens: one pound of shrimp delivers roughly 23 grams of protein in just 113 calories. Add a couple of simple sides, and you’re hitting 28 grams of protein while staying comfortably under 400 calories.
Table of Contents
Unlike chicken breast, which can turn rubbery if you’re not careful, shrimp actually benefits from quick cooking. A high-heat sear takes minutes and locks in moisture and flavor. That’s why high protein shrimp meal prep is perfect for people who don’t have hours to spend in the kitchen. You get restaurant-quality texture without the restaurant time commitment.
Ingredients You’ll Need
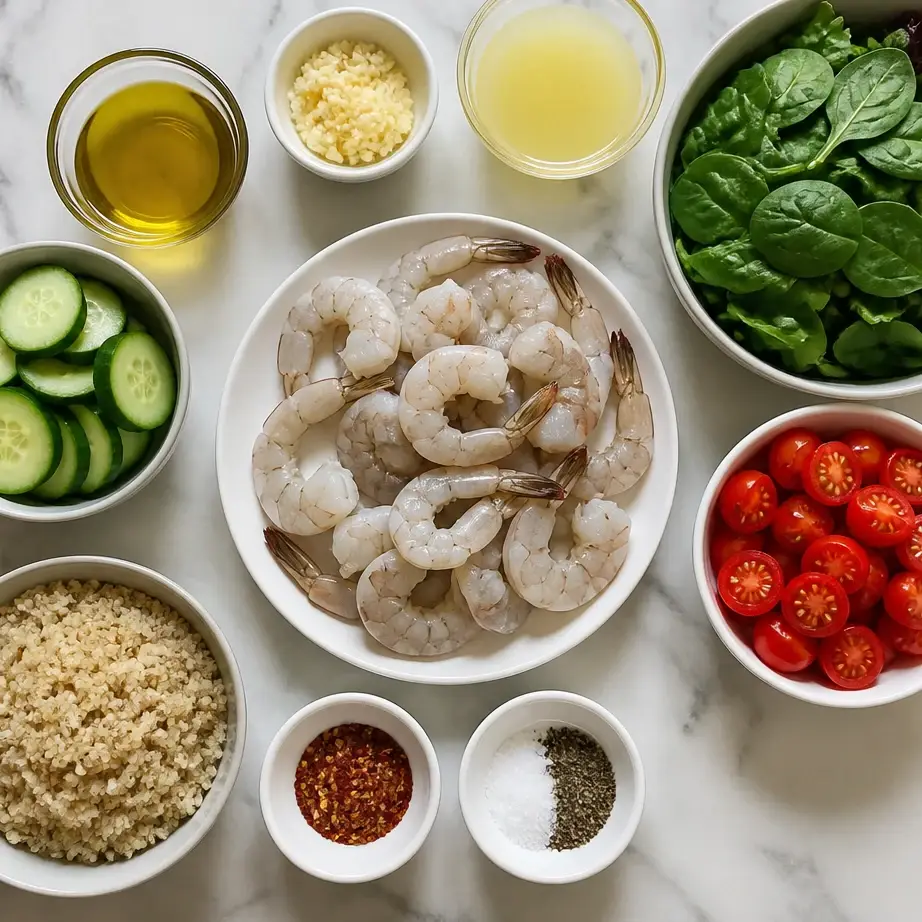
This shrimp lunch meal prep is built on simple, everyday ingredients. No specialty oils, no hard-to-find seasonings, just real food that tastes better the more times you make it.
- 1.5 pounds large shrimp, peeled and deveined (frozen works great)
- 3 tablespoons olive oil
- 4 cloves garlic, minced
- Juice of 2 lemons
- 1 teaspoon red pepper flakes
- Salt and black pepper to taste
- 3 cups baby spinach or mixed greens
- 2 cups cherry tomatoes, halved
- 1 large cucumber, sliced
- 1 cup cooked quinoa or brown rice (optional, for carbs)
- Fresh parsley for garnish
A quick note on the shrimp: Frozen shrimp are just as nutritious as fresh and often fresher since they’re frozen on the boat. Thaw them overnight in the fridge or run them under cold water for 5 minutes before cooking. The garlic gives you bold flavor without extra calories, and the lemon juice adds brightness that makes this feel less like “meal prep food” and more like something you’d actually choose for lunch.
How to Build Your Shrimp Lunch Meal Prep
Step 1: Prep Your Produce
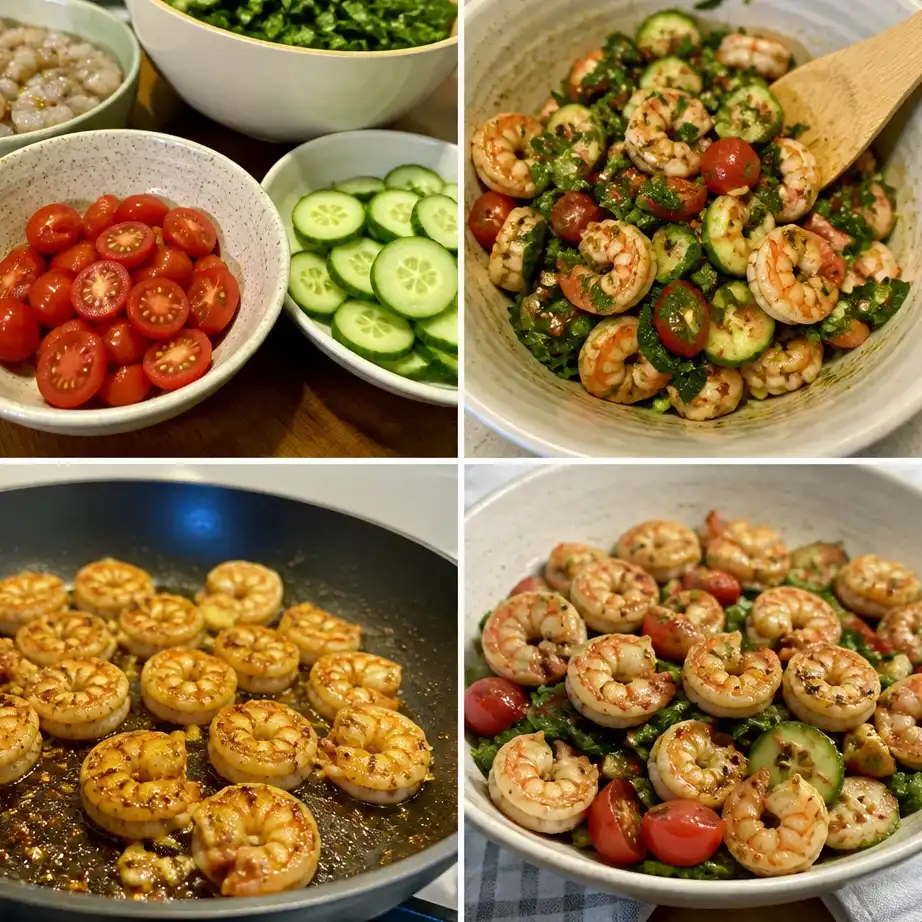
While your shrimp thaws, chop your vegetables and cook your grain if you’re using one. Halve the cherry tomatoes, slice the cucumber, and roughly chop your greens. This takes about 10 minutes and sets you up for the final assembly.
Step 2: Sear the Shrimp
Heat 2 tablespoons of olive oil in a large skillet over medium-high heat. Once it’s shimmering, add the minced garlic and cook for about 30 seconds until fragrant. Add the shrimp and season with salt and pepper. Let them cook undisturbed for 90 seconds so they develop a golden sear, then flip and cook another minute or two until they turn pink and opaque.
Step 3: Finish with Acid and Heat
Remove the pan from heat. Add the lemon juice and red pepper flakes. Toss everything together so the shrimp are coated in that garlicky, lemony goodness. Taste it and adjust the seasoning. This is your moment to make it taste exactly how you want it.
Step 4: Cool Before Storing
Let the shrimp cool for 5 minutes at room temperature. This prevents condensation in your containers later, which keeps everything fresh longer. Transfer to a clean cutting board if you need the pan for something else.
While you are here, take a look at my Bang Bang Shrimp Bowls for more easy ideas.
Step 5: Assemble Your Containers
Grab five meal prep containers. In the bottom of each, layer your greens first. They act as a moisture barrier. Top with the sliced cucumber, cherry tomatoes, and shrimp. If you’re using quinoa or rice, add about a quarter cup to each container. Drizzle the remaining tablespoon of olive oil over the top, and you’re done.
Emma’s Go-To Tips
Swap the grain: Quinoa is my default because it holds up well in the fridge, but brown rice, farro, or even cauliflower rice work beautifully here. Pick whatever keeps you excited about lunch.
Make it spicier: If red pepper flakes feel mild to you, add a dash of hot sauce to your container on eating day, or throw in some sliced jalapenos during assembly. Heat keeps you engaged with your food.
Storage wins: Keep the shrimp and dressing separate if you’re concerned about texture. Store the shrimp in its own small container and dress your salad right before eating. It takes one extra second and your lunch stays crisp and delicious all week.
What You’re Actually Eating (Nutrition Snapshot)
Per serving (based on 5 containers):
- Protein: 28g
- Calories: 185 (shrimp and vegetables only; add 90-120 for grain if included)
- Carbohydrates: 8g
- Fat: 9g
If you add a quarter cup of quinoa, your total lands around 310 calories with 32g protein. Still comfortably under your targets. Macros vary slightly depending on whether you use frozen or fresh, and exact portion sizes.
What Pairs Well With This
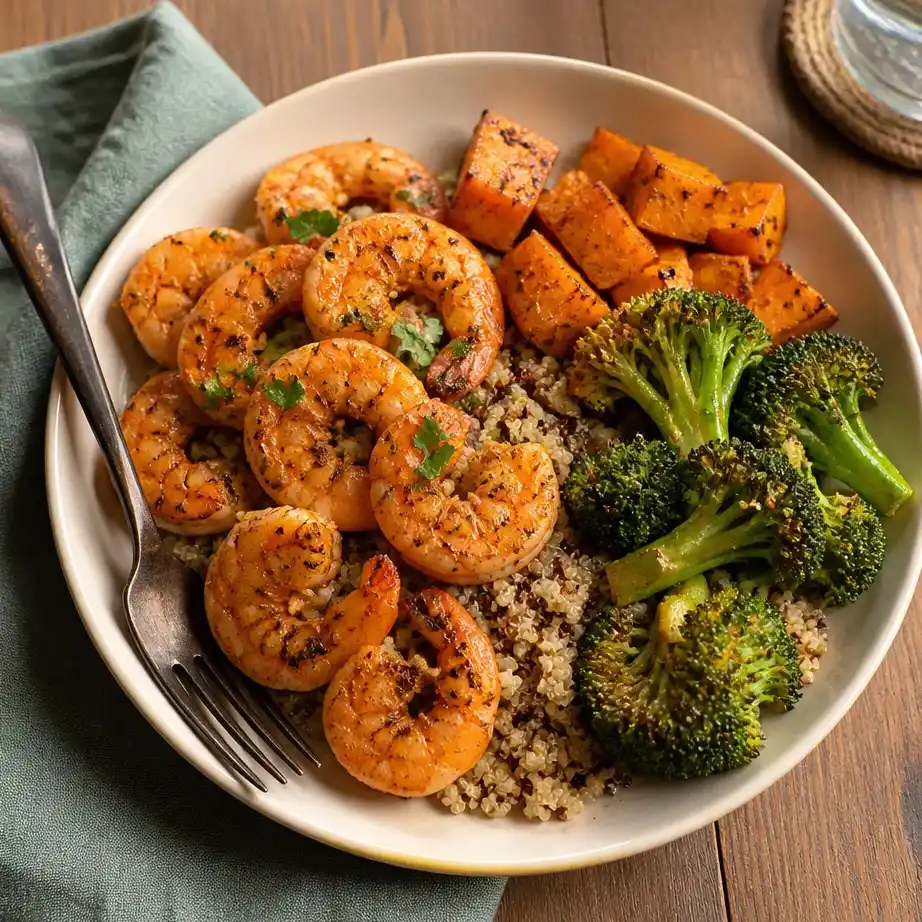
Serve each container with a slice of whole grain bread on the side for a light toast option. A tall glass of unsweetened iced tea or sparkling water keeps things refreshing. If you’re building a full meal, add a small side of hummus or tzatziki for dipping those veggies. Some people love a handful of nuts on top for crunch and extra fat to slow digestion, which keeps you full longer.
Storage and Reheating
Keep these containers on the shelf right at eye level in your fridge so you actually see them and eat them. They stay fresh for up to five days, though I’ve found they taste best on days two through four. The shrimp firms up as it cools, which is perfect for meal prep texture.
You can eat this straight from the fridge on days when you want something cool and crisp. On chilly days, warm the shrimp gently in a 300-degree oven for about 5 minutes, or pop it in the microwave for 60 to 90 seconds. Don’t nuke it longer than that, or you’ll end up with shrimp that’s firm to the point of being tough. The vegetables are fine eaten cold or warm, whatever you prefer.
If this recipe fits your routine, you will also enjoy my No-Cook High Protein Meal Prep.
Questions People Actually Ask
Can I make this with cooked shrimp from the grocery store?
Absolutely. It saves you 5 minutes and tastes just as good. Just make sure you reheat that garlic-lemon oil in a pan, add the cooked shrimp for a minute or two to coat it, then cool and store.
How much protein is in the shrimp if I skip the grain?
Still 28 grams per serving. The shrimp is doing all the heavy lifting. If you add quinoa or rice, you bump that up slightly because those grains have protein too, bringing you to around 32 to 35 grams depending on portion.
Can I prep this without spinach?
Yes. Use arugula, kale, mixed greens, or whatever you have. The spinach is just a mild, clean base. Some people use butter lettuce or even skip greens entirely and load up on more veggies instead. You’re not locked in.
Does shrimp freeze well after I cook it?
It does, though texture can get a little rubbery if you’re not careful. I recommend eating these containers fresh from the fridge rather than freezing. But if you’re in a pinch, it’s better than throwing it away. Thaw in the fridge overnight and reheat gently.
What if I don’t like red pepper flakes?
Skip them entirely and use fresh dill, Italian herbs, or just stick with lemon and garlic. Flavor is personal. The shrimp is good enough on its own; the spice is just a bonus.
Can I double this recipe?
Yes. Just double everything and prep 10 containers instead of five. It takes maybe 40 minutes total, and suddenly you’ve got shrimp lunches for two weeks if you freeze half of them properly.
The Real Win
This is the kind of meal prep that actually sticks. You’re not forcing yourself to eat something bland and joyless. You’re building lunches that taste good, keep you satisfied, and take 20 minutes to make. The shrimp stays tender, the vegetables stay fresh, and that garlic-lemon flavor gets better as the days go by.
Next time you’re staring at your lunch options at 12:30 and thinking about the sad desk sandwich you packed, you’ll be grateful this container exists. That’s meal prep done right.
Save this to your Pinterest board for later, rate it if you loved it, and let me know in the comments if you tried it. I read every single one.
High Protein Shrimp Lunch Meal Prep (Quick, Under 400 Cal)
Equipment
- large skillet
- meal prep containers
- cutting board
Ingredients
- 1.5 pounds large shrimp, peeled and deveined
- 3 tablespoons olive oil
- 4 cloves garlic, minced
- Juice of 2 lemons
- 1 teaspoon red pepper flakes
- Salt and black pepper to taste
- 3 cups baby spinach or mixed greens
- 2 cups cherry tomatoes, halved
- 1 large cucumber, sliced
- 1 cup cooked quinoa or brown rice (optional)
Instructions
- Step 1: Prep your produce by halving cherry tomatoes, slicing cucumber, and roughly chopping greens (about 10 minutes).
- Step 2: Heat 2 tablespoons olive oil in a large skillet over medium-high heat. Add minced garlic, cook 30 seconds until fragrant. Add shrimp, season with salt and pepper, and let cook undisturbed for 90 seconds until golden. Flip and cook 1-2 minutes until pink and opaque.
- Step 3: Remove from heat, add lemon juice and red pepper flakes. Toss to coat shrimp evenly. Taste and adjust seasoning as needed.
- Step 4: Let shrimp cool for 5 minutes at room temperature to prevent condensation.
- Step 5: Assemble five meal prep containers by layering greens on bottom, then cucumber, tomatoes, and shrimp. Add optional grain, drizzle with remaining tablespoon of olive oil.